
Why proper shutdowns matter
"Play Tesla" means mastering the vehicle's power management, not just driving it. Unlike gas cars, Teslas manage their own states automatically. When you walk away with the phone key or key fob, the car enters Sleep Mode.
This automatic shutdown is critical for battery health. While awake, the car keeps the touchscreen active and the cellular modem online. This drains the 12-volt auxiliary battery and adds minor wear to the main traction battery. By allowing the car to sleep, you ensure the 12-volt system stays charged and the software remains stable.
Thinking of "playing" your Tesla correctly means respecting this sleep cycle. If you frequently open the app to check the charge level or use the doors, you wake the car up, preventing it from resting. This constant waking and sleeping can lead to a dead 12-volt battery, which is the most common reason for roadside assistance calls in the first year of ownership. Proper shutdowns are not about turning the car off; they are about letting it rest so it is ready when you need it.
Step by step: entering sleep mode
When you park your Tesla and walk away, the car doesn't shut down immediately. It stays awake for a period of time to maintain connectivity, run background checks, and wait for commands. This "idle" state draws power from the battery, known as parasitic drain. If you are leaving the vehicle for an extended period or want to ensure maximum battery health before installing your new wall charger, you need to manually force the car into a deep sleep.
Getting your Tesla to sleep is straightforward, but it requires a specific sequence of actions. If you skip a step, the car may remain in a low-power standby mode rather than fully sleeping, which keeps systems like the Sentry Mode or Bluetooth radios active. Follow this ordered sequence to ensure your vehicle powers down completely.

Walk to the driver's door and press the lock button on the door handle. You should hear a single chime and see the side mirrors fold in. Do not walk away yet. If you use key fob locking, walk away from the car after pressing the lock button; the car will lock automatically once you are out of range. Ensure all doors, the frunk, and the trunk are fully closed. An open door will prevent the car from entering sleep mode.

This is the most common reason cars stay awake. If your phone remains connected via Bluetooth, the car assumes you might be nearby and needs to respond to unlock commands. Go into your phone's Bluetooth settings and temporarily disable Bluetooth, or explicitly "Forget" the Tesla vehicle. Alternatively, you can turn on Airplane Mode. This severs the local connection and signals the car that no one is nearby.

Open the Tesla app on your phone. Look at the status indicator next to your vehicle's name. If the car is still awake, it may show "Awake" or a battery percentage that is actively updating. Wait for the status to change to "Sleeping" or "Offline." In sleep mode, the app will not show real-time data, and the battery percentage may update less frequently. This confirms the car has shut down its main systems to conserve energy.
By following these steps, you minimize the time your Tesla spends in a power-draining idle state. This is particularly important if you are preparing the vehicle for long-term storage or if you want to ensure that the battery is at its optimal charge level before connecting to your new home charging station. A fully slept car also resets its software background processes, which can sometimes resolve minor glitches.
Choosing the right wall charger
Selecting the best home charging solution depends on your budget, vehicle model, and how much power you actually need. Most Tesla owners stick with Level 2 chargers that plug into a 240-volt outlet, similar to what a large dryer uses. This setup adds about 25 to 30 miles of range per hour, which is plenty for daily commuting.
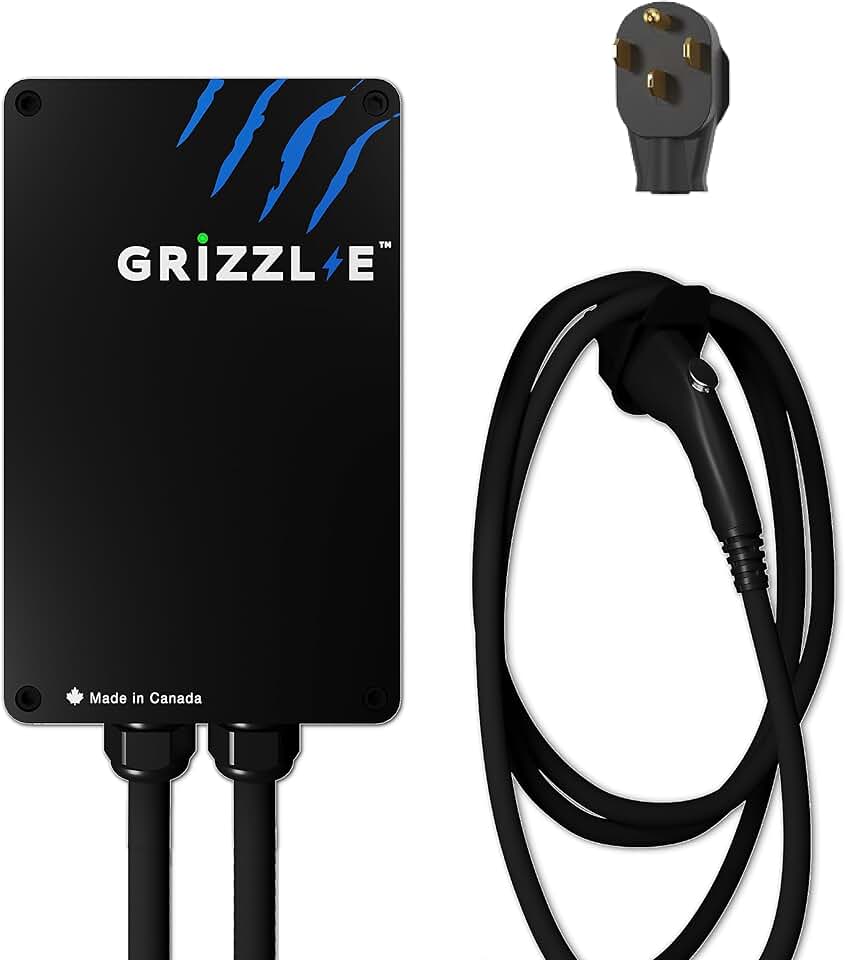
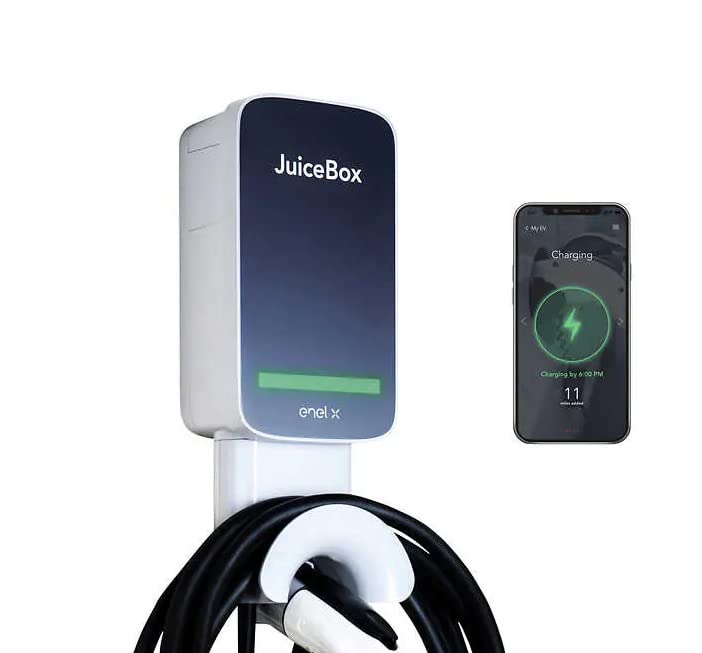
You generally have two main paths: the official Tesla Wall Connector or a third-party Level 2 charger. The Tesla unit is designed specifically for the brand, offering seamless integration with the car's software and a durable, weather-resistant build. Third-party options often cost less upfront and may offer more flexible cable lengths or mounting options, though they might lack some of the proprietary smart features.
To help you compare the core differences, here is a side-by-side look at the most common options available for Play Tesla setups.
| Feature | Tesla Wall Connector | Third-Party Level 2 |
|---|---|---|
| Max Power | Up to 48A (11.5 kW) | Usually 32A–40A (7.7–9.6 kW) |
| Cable Length | 23 ft standard | Often 18–25 ft, varies by brand |
| App Integration | Native Tesla app support | Varies; often separate apps |
| Price Range | $500–$700 | $300–$600 |
| Warranty | 3 years | 2–3 years typical |
If you want to see what these chargers look like in a real home setting, check out this comparison image.
For those who prefer shopping online, here are some top-rated Level 2 home chargers that are widely compatible with Tesla vehicles. These options cover the core gear you need to start charging at home.

As an Amazon Associate, we may earn from qualifying purchases.
Installing your home charging station
Setting up a dedicated wall charger is the most reliable way to Play Tesla from home. While the Mobile Connector included with your car works for emergencies, a permanent installation provides faster, safer, and more consistent charging. This process involves more than just plugging in a device; it requires careful planning around your home’s electrical capacity and local building codes.
Before you buy hardware, you need to determine if your electrical panel can handle the load. A Level 2 charger typically draws 240 volts, similar to a large dryer or oven. If your panel is already near capacity, you may need an upgrade or a sub-panel. A licensed electrician will perform a load calculation to ensure your system can support the new circuit without tripping breakers or creating fire hazards. This step is non-negotiable for safety and code compliance.
Once you have selected a charger and confirmed your panel’s capacity, the physical installation begins. This involves running conduit and wiring from your panel to the desired charging location, which is usually a garage or covered driveway. The electrician will mount the charging unit, connect the wiring, and test the system to ensure it communicates correctly with your vehicle. After inspection and approval, you are ready to start charging.
Hire a licensed electrician to evaluate your main service panel. They will calculate the available amperage to ensure it can support a dedicated 240-volt circuit for the charger. If your panel is full or outdated, discuss upgrade options or the installation of a sub-panel before proceeding.
Choose a Level 2 charger compatible with your Tesla model. Consider factors like cable length, smart connectivity features, and weather resistance if the unit will be installed outdoors. Ensure the unit meets UL safety standards and local electrical codes. Order the unit early, as lead times can vary.
The electrician will install a dedicated circuit from your panel to the charging location. This involves running appropriate gauge wire through conduit, which protects the wiring from physical damage and environmental factors. The path should be as direct as possible to minimize voltage drop and material costs.
Once the wiring is in place, the electrician mounts the charging unit securely to the wall. They connect the power lines to the unit’s terminal block and ensure all ground connections are solid. The unit is then tested for proper voltage and communication with the vehicle’s charging port.

Your local building department may require a final inspection to verify code compliance. After passing inspection, perform a test charge with your Tesla to ensure the charger starts and stops correctly. Configure any smart settings via the manufacturer’s app if desired.
Common mistakes to avoid
Even with the right charger, small habits can degrade your Tesla’s battery or cause installation headaches. Treating the car like a traditional gas vehicle often leads to unnecessary wear. Here are the most frequent errors owners make when they first try to Play Tesla.
Leaving Sentry Mode running constantly
Sentry Mode is excellent for security, but it keeps the battery awake and drains power even when the car is parked. If you leave it on overnight or during long trips, you will notice a significant drop in range before you even start driving. Only enable it when you are in high-risk areas or leaving the car for an extended period.
Using incompatible or low-quality chargers
Not all Level 2 chargers are created equal. Using a cheap, uncertified wall connector can lead to poor communication between the car and the charger, causing charging sessions to fail or stop prematurely. Always use a charger that is explicitly rated for Tesla vehicles and meets local electrical safety standards. This protects both your home’s wiring and the car’s onboard charger.
Ignoring charge limits
Setting your daily charge limit to 100% every day puts stress on the lithium-ion cells. For daily driving, keeping the limit between 80% and 90% extends the battery’s overall lifespan. Reserve the 100% charge only for long road trips when you need every mile of range. You can adjust this setting in the car’s touchscreen or through the mobile app before you plug in.
Forgetting to check the connection
Before you walk away, always verify that the charging handle is fully locked into the port. A loose connection can cause arcing, heat buildup, or interrupted charging. The car will usually alert you if the connection is poor, but relying on the audible click and the visual confirmation on the screen is the safest habit.
Open the charging screen on your touchscreen and ensure the daily limit is set to 80-90% for regular use. This simple step prevents unnecessary battery degradation.
Inspect your wall connector to ensure it is a certified Level 2 unit designed for EVs. Avoid generic adapters or uncertified cables that may not communicate properly with the car.
Plug in the vehicle and listen for the lock click. Confirm the status light on the charger and the car indicates a solid, stable connection before leaving.
No comments yet. Be the first to share your thoughts!